To generate a Google Translate API key, you must first join the Google Cloud Console. Remember that, while Google will ask for your credit card information when you sign up, you can use the translation API for free as long as you keep below the free tier limits (500.000 translated characters per month). This means that until you explicitly upgrade your account to a premium plan, your card will not be charged.
Step-by-Step Guide to Generating a Google Translate API Key
Step 1: Sign in or create Google account
- Go to the Google Cloud Console website at https://console.cloud.google.com/
- If you already have a Google account, sign in using your credentials. Otherwise, create a new account by clicking on the “Create account” button and following the registration process.
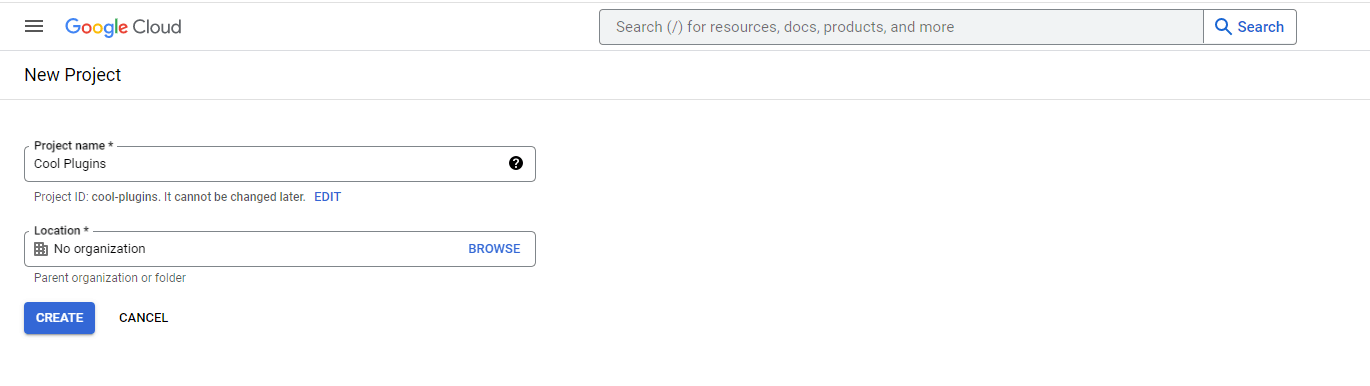
Step 2: Create a new project
- Navigate to the Cloud Platform Console. Click the tiny arrow pointing down from the top bar, then click the New Project button in the pop-up that appears.
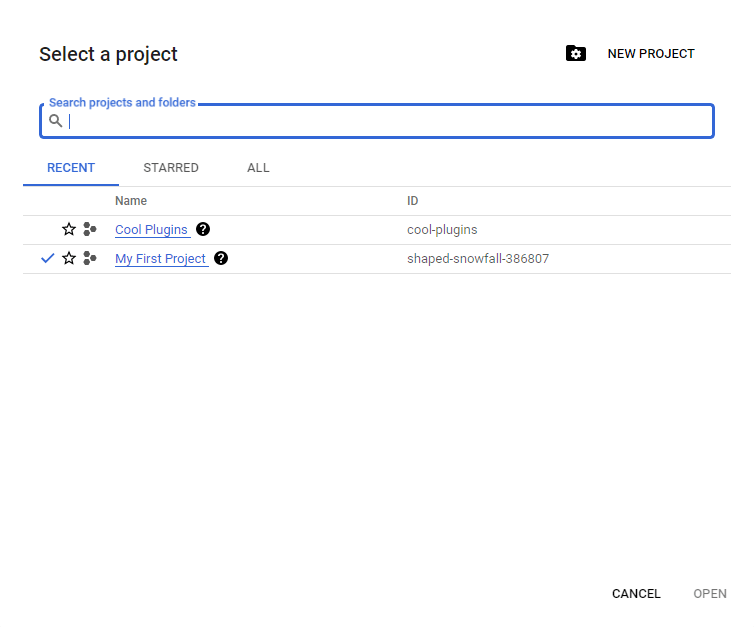
- Now, enter the name of your project and click “Create“.
Step 3: Enable Google Cloud Translation API
- With the new translation project selected, navigate to the left-hand hamburger menu and select API & Services.
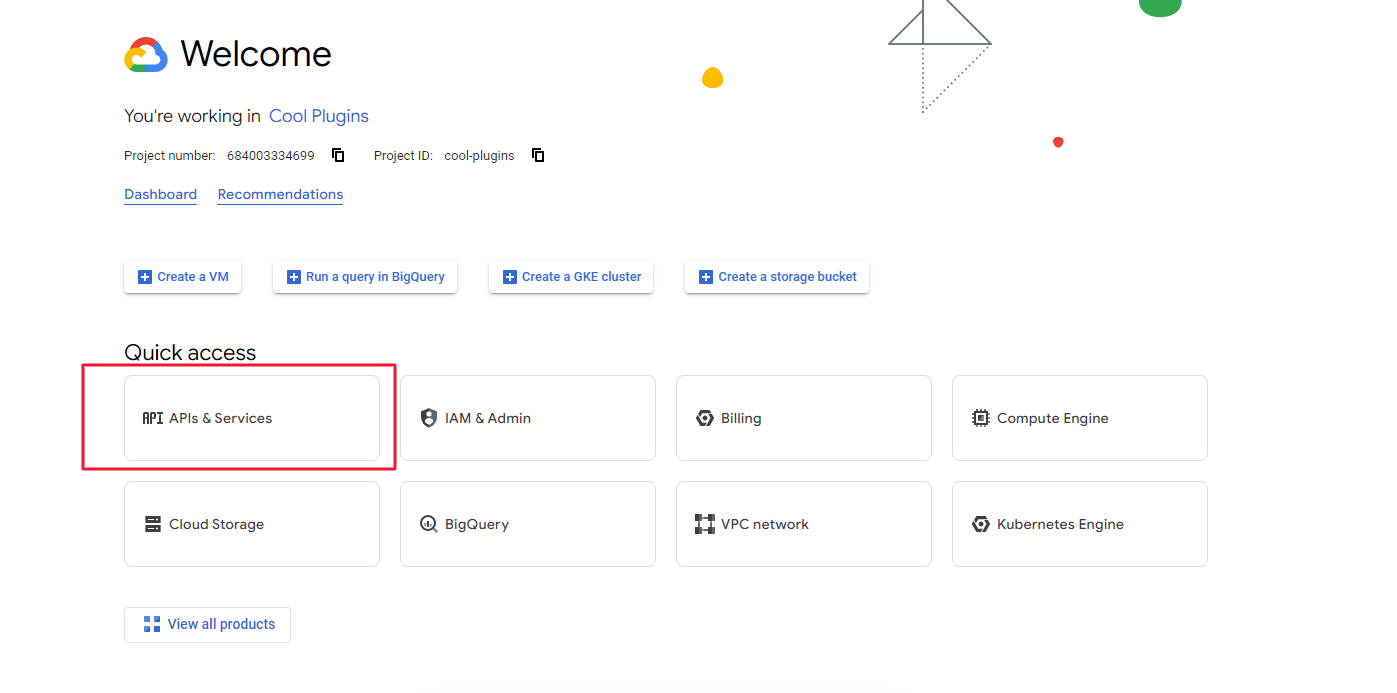
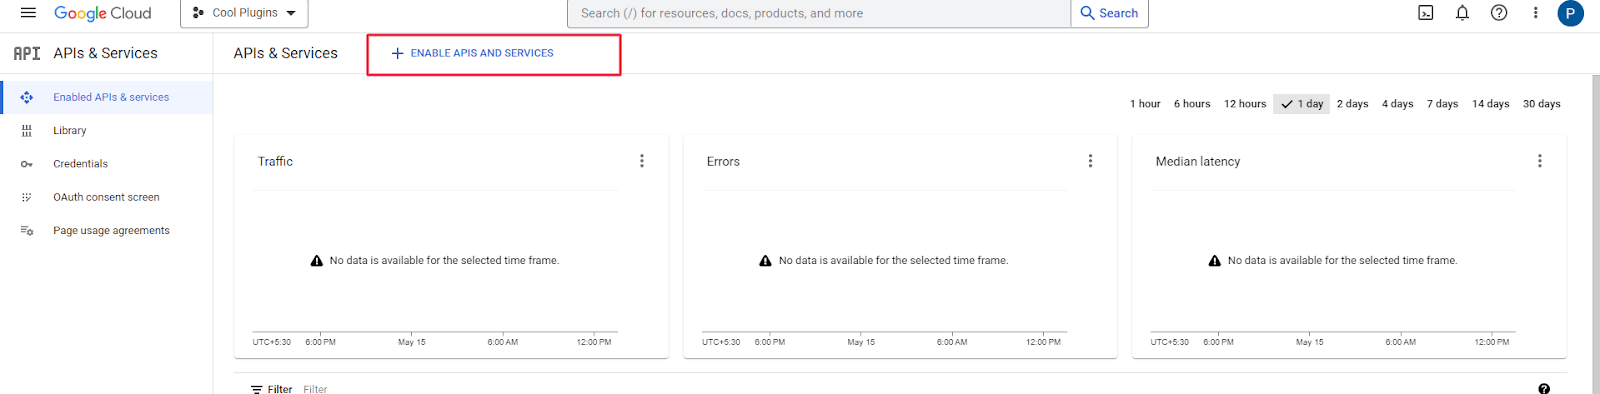
- Then, in your dashboard, select the + Enable APIs and Services button to enable the Google Translate API.
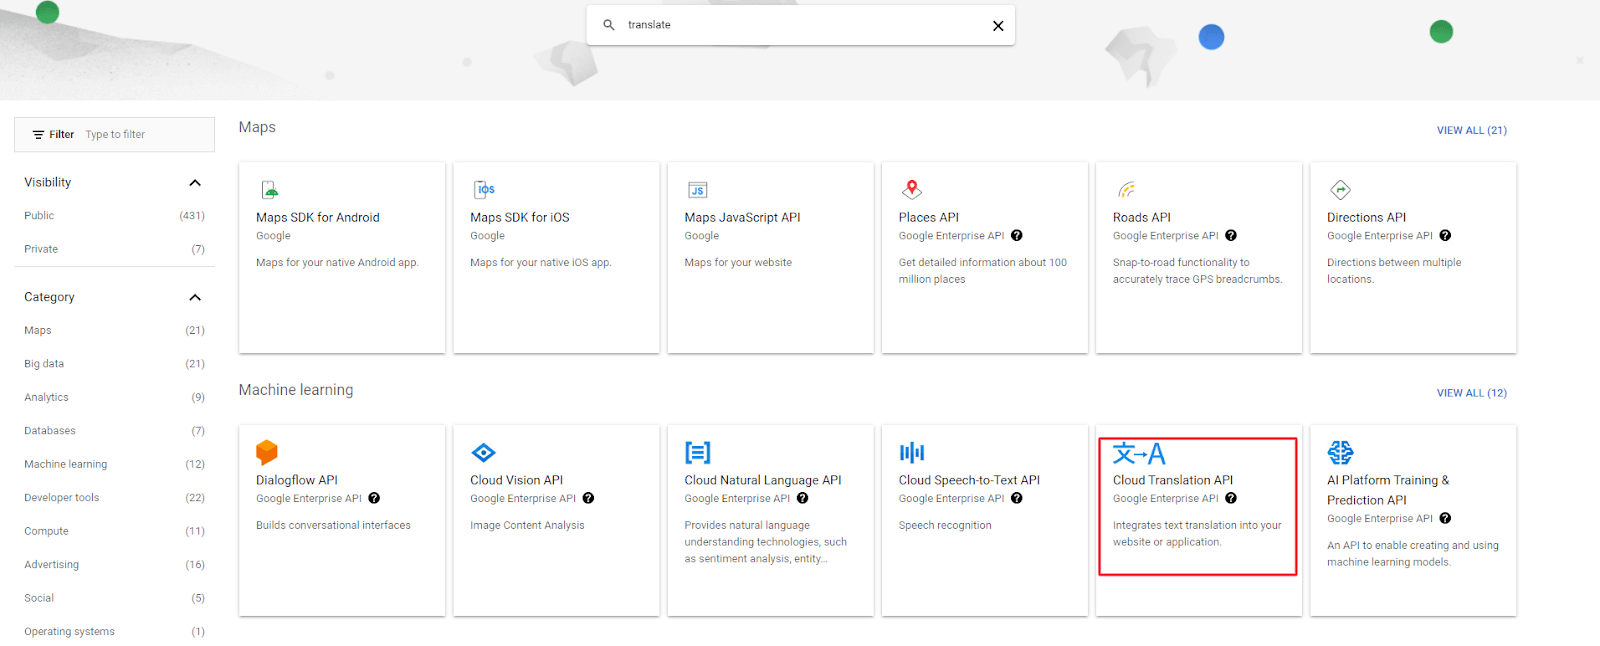
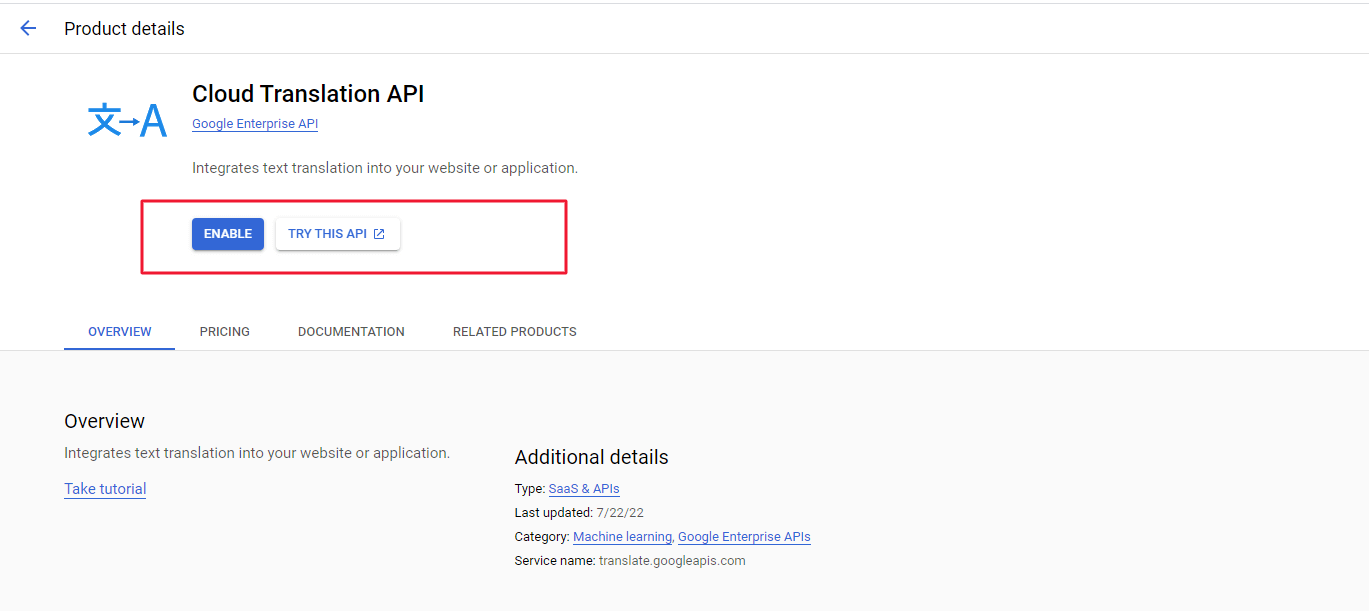
- This will launch the API Library, where you must enter the Cloud Translation API into the search bar. Pick it and click Enable.
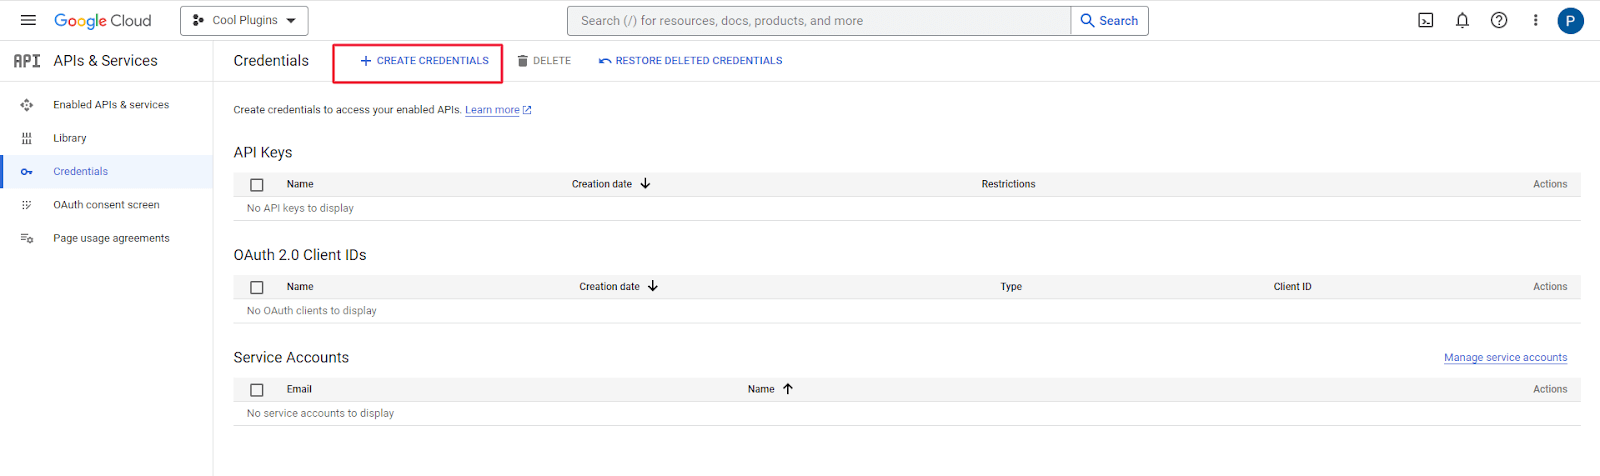
Step 4: Generate API key
- Then, on the sidebar, navigate to the Credentials tab. At the top of the page, click the Create Credentials button and select API Key from the selection menu.
- Your API key will now be generated automatically.
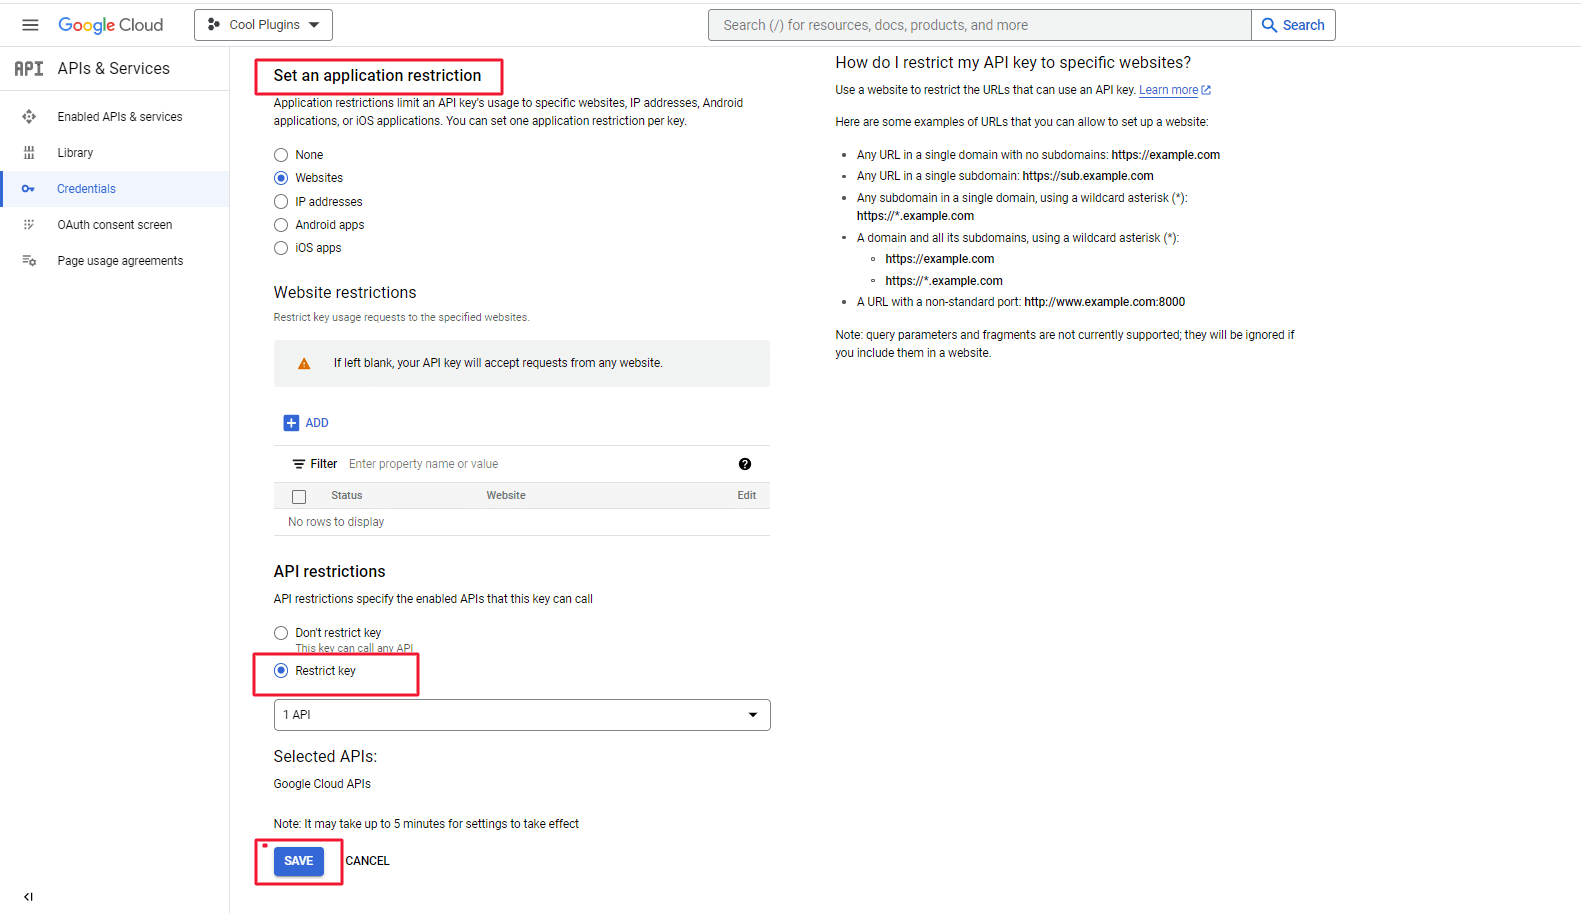
Step 5: Restrict API Key to a Single Website
- Use the HTTP referrer supplied in the description of the Google Translate API Key field in the Settings Loco Translate Automatic Translation tab in the Google Dashboard, as seen in the screenshot below.
Step 6: Set Limits on Translation API Usage
- Setting limits to limit consumption is strongly suggested to have control over the cost of the Google Translate API.
- Go to Enabled APIs and Services from the same APIs and Services panel, scroll down the page, and find the Cloud Translation API.
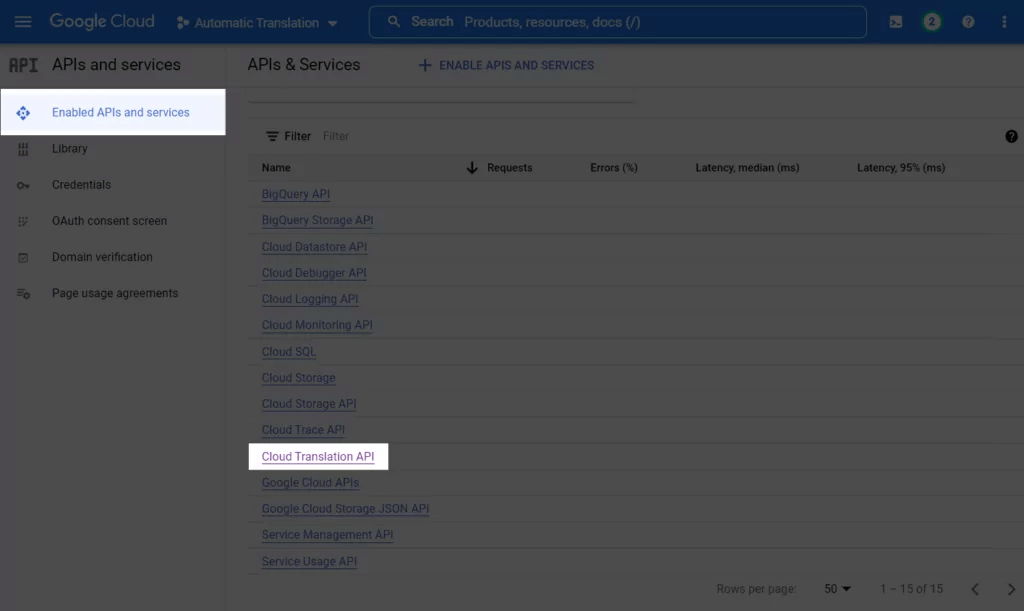
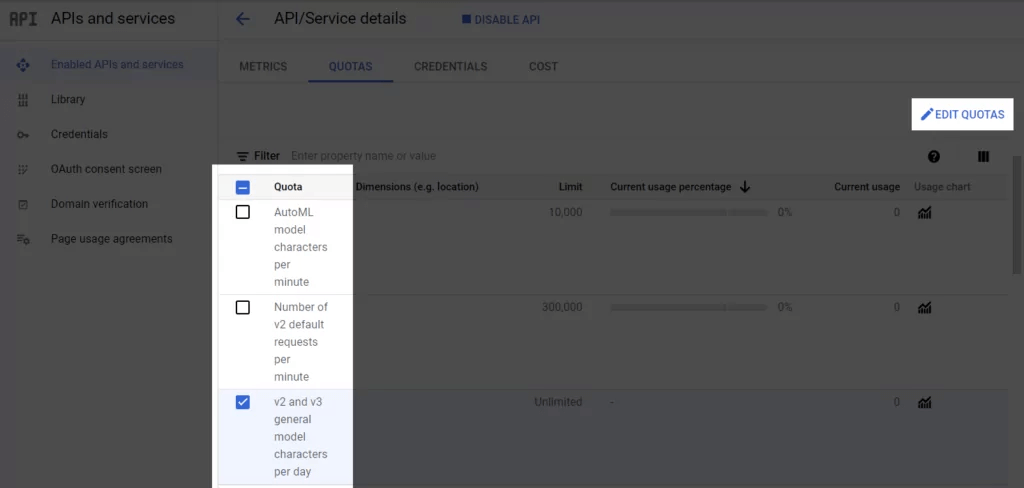
- Navigate to the Quotas tab after clicking it.
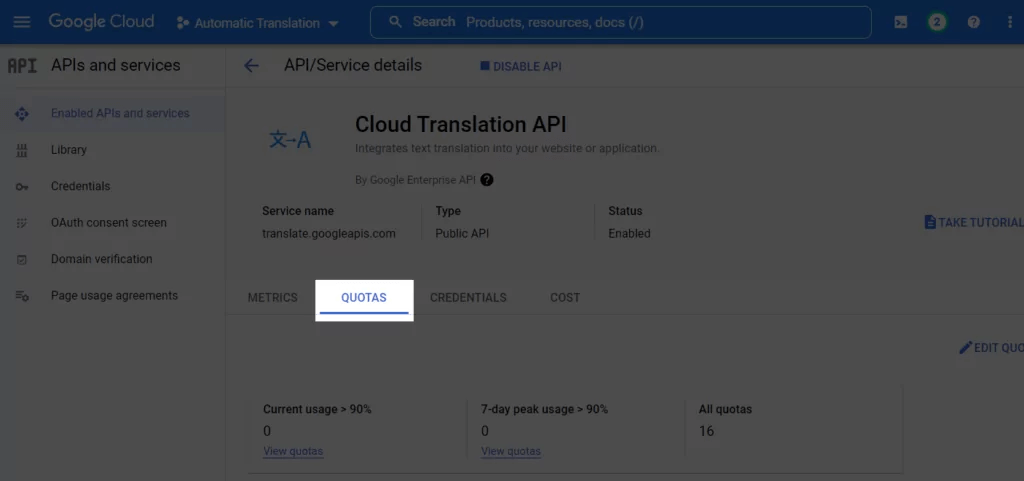
- You may examine all of your quotas from here, choose the ones you wish to change, and then adjust them.
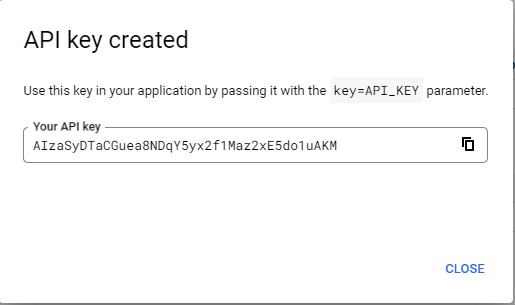
Step 7: Copy & paste API key
- Return to the Credentials page and select the Show Key button next to your newly generated API key.

- A new pop-up window will open, displaying your API key. Take it from here.
That’s all! You may now just navigate to the front end of your WordPress-powered website and browse it in your preferred language. The material has been mechanically translated, as you can see.